PayLink Learning Center
How do I set up products?
To get started with PayLink Online or Dine In ordering, you’ll need to add products to your menu.

How to create categories
Overview
PayLink’s online menu requires categories to be added for products. This helps customers seamlessly navigate your menu. Before adding any products, first create all of your necessary categories. Some examples of categories would be Drinks, Dinner Entrees, Lunch Entrees, Desserts, ect.

How to add a new category
1. Once logged in navigate to Products 〉 Categories.
2. Click “Create New”.
3. Add a new name and click on the Create button.
- The Tags and Sort Order fields can be left blank.
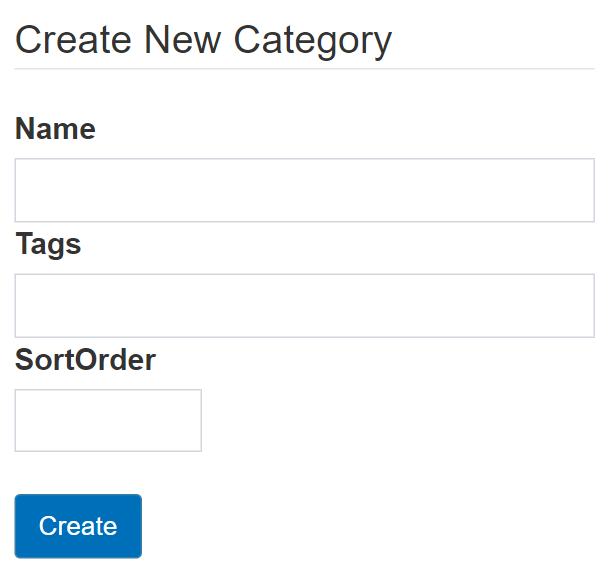
4. Your new category has been added!
- Note: You can remove a category using the button next to the category name. You must make sure no products are connected to the category before doing so.
Use the Category field on the product edit or create pages under Products 〉 Product List to connect products to categories.
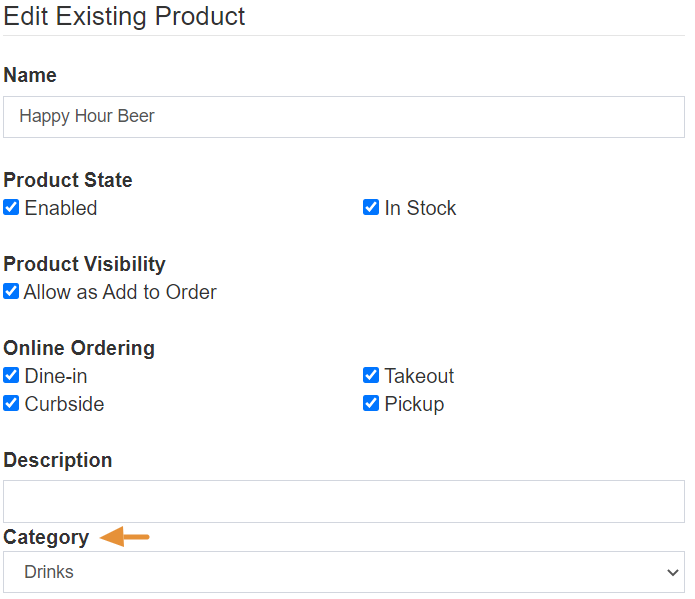
Categories will be displayed to customers on the Create section.

Adding and Managing Tax Rates
Overview
If your products require taxes, you’ll first want to create a Tax Rate in PayLink, after which you can assign to individual products. When a customer makes a purchase, they will automatically be charged for the product + tax.
⇒ Note: multiple taxes can be assigned to a product, which is useful for applying special taxes to items (e.g., Recycling Fees).
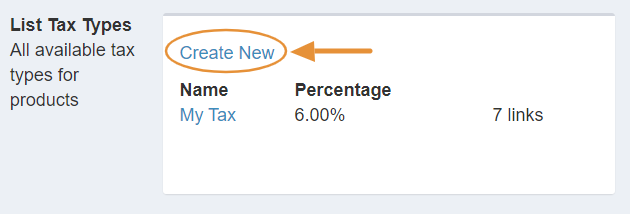
The links section represents how many products the tax rate is assigned to. For example, “10 links” means that the tax rate is assigned to 10 different products and “0 links” would indicate that the tax rate is not currently applied to any products.
How to create a Tax Rate
1. Navigate to Products 〉 Tax Rates.
2. Click on Create New.
3. Enter a new name for the tax. 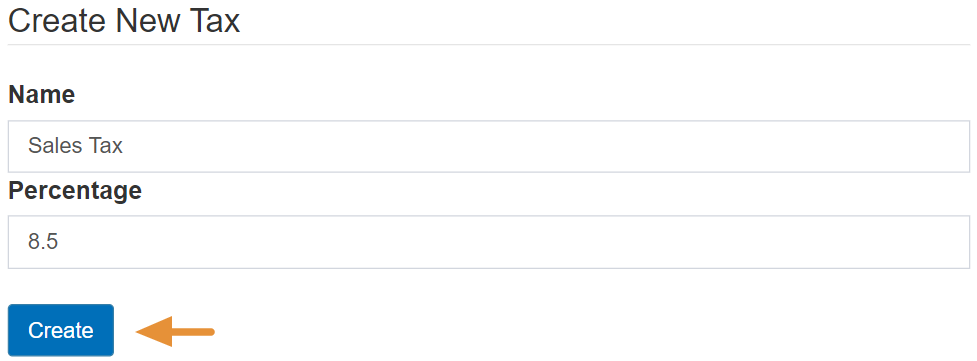
4. Enter a percentage.
5. Click the Create button.
Your new tax rate will be displayed on the page at Products 〉 Tax Rates.
How to apply a Tax Rate to a Product
1. Navigate to the Products edit or create page at Products 〉 Product List.
2. Select an existing product to edit or create a new one.
3. Select the checkbox for the Tax Rates you want to apply.
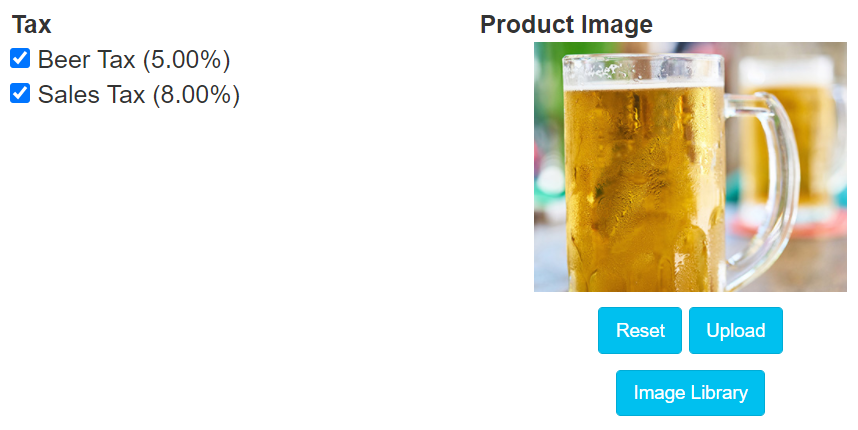
4. Save
![]()
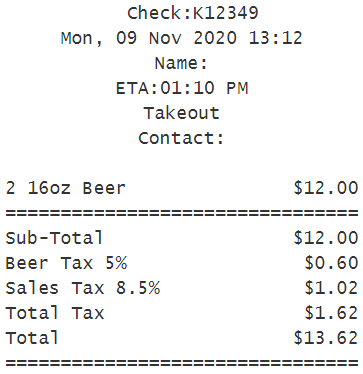
- Note: Taxes on orders are viewable from the digital receipt and applied per product. Use the Sales Report for a daily overview of tax totals.
How do I Create New Products
Overview
To get started with PayLink Online or Dine In ordering, you’ll need to add products to your menu. To manage your menu head to Products 〉 Product List you can customize your items by adding descriptions and images.
Creating a product
1. Navigate to Products 〉 Product List
- Here you can view a list of all products described by Name, POS ID, Category, Enabled, In Stock, Price.
- PayLink supports the ability to duplicate and delete using the icons to the right.

2. Click on “Create New”.
3. Add Name.
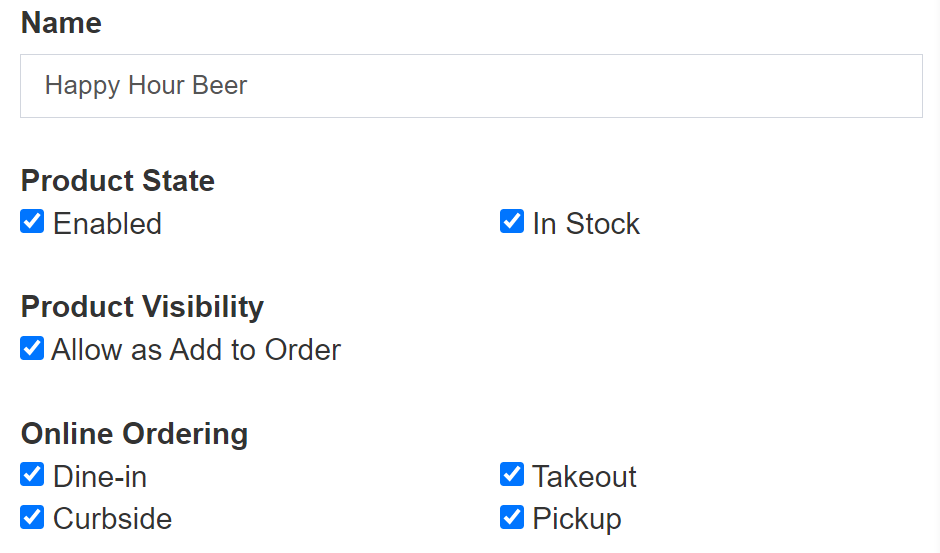
4. Select Product Options.
- Enabled will add/remove products from the online store.
- Out-of-Stock will add/remove products from the online store.
- Allow as Add to Order will add/remove the Add to Order button.
- Online Ordering lists the available order types.
- Dine In
- Take Out
- Curbside
- Pickup
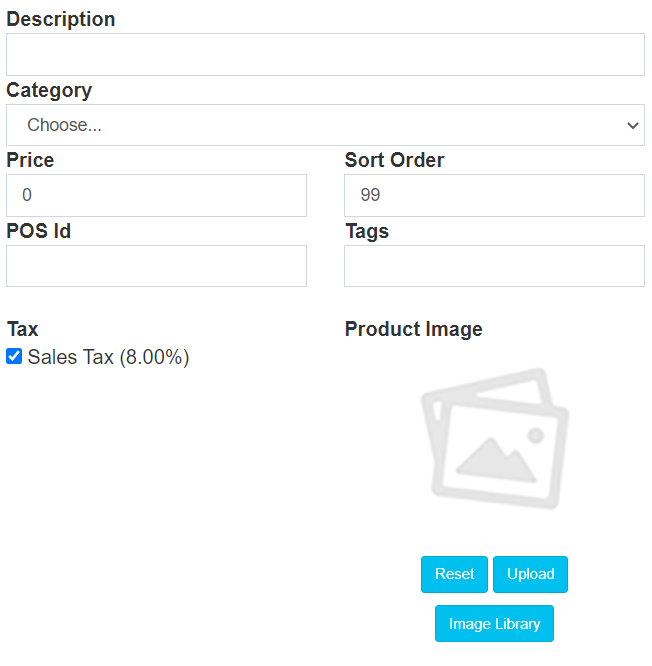
5. Add taxes, description, product images, and assign a category. Please note: The product name, category and price fields are required.
- Optional: Add Sort Order, POS ID, Tags, and Tax.
6. Add product modifiers.
7. Adding Product Images:
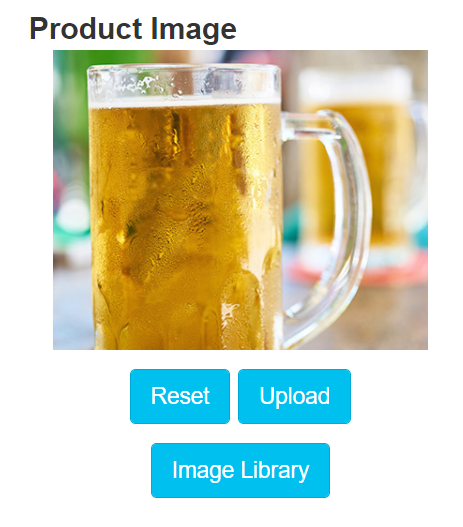
- Adding images is a great way to improve your customers’ experience and helps them choose what to order. You can upload your own product images, or you can select one from the Image Library. Image Library contains default and vector images that can be used to represent your products. To upload your own photo, use the Upload button, rotate, and crop.

- When selecting photos to upload make sure that product images are not too zoomed in. See the image library for examples.

- Ensure portion sizes and ingredients are accurately represented.

Requirements:
- JPEG or PNG
- Recommend at least 800px x 800px resolution
8. Click the Create button.
- The new product will be saved to the Products page where it can be edited at any time by selecting the product name from the list.

9. To see the product in your store, visit https://[yourstorename].pay.link/.

If your PayLink account is integrated with Micros POS, see the Menu Builder page for instructions on how to import a list of products from your POS system.
How to Add Modifiers to Your Product
Overview
Modifiers for products allow your customers to customize their orders. For example, adding a modifier grouping of “Cheese” with several options, such as Cheddar, Provolone, etc., to a product called “Burger” will allow your customers to choose which type of cheese they'd like to add to their burger. Other uses include allowing customers to remove ingredients and add comments for additional requests (e.g., sauce on the side).
How to add a new modifier
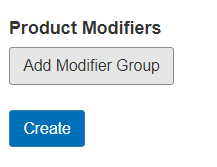
1. Click the Add Modifier Group button at the bottom of the product create or edit page.
2. Add a Modifier Grouping name in the field. This will be the title for the type of modifiers in the grouping (e.g., Sides, Toppings, Sauces, Extras, etc.)
- POSRefID can be left blank unless your system is integrated with a POS system, such as Micros, etc.
- Sort Order field can be used to configure the order in which you’d like the modifiers to be displayed. The lower the number, the higher up it appears on the list (e.g., “1” will display the grouping first, “2” will display the grouping second).
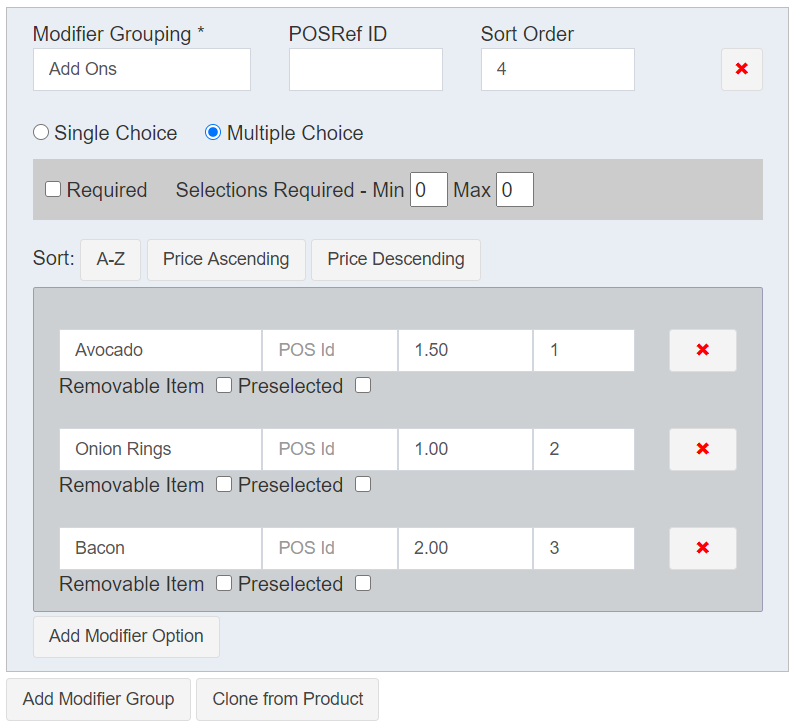
3. Click the Add Modifier Option button within the grouping to add an option or modifier option. (e.g.,Lettuce).
4. Choose Single Choice or Multiple Choice.

- Single Choice will require customers to choose a single modifier option.
- This is useful for modifiers, such as “Choose your type of bread”, on a sandwich. The grouping would list something similar to “White, Wheat, Sourdough”.

- Multiple Choice will allow the customer to choose multiple selections from the modifier grouping.
- Clicking the Required checkbox with the multiple choice grouping option will insert a range from Min to Max.
- The Min value will be the least amount of modifiers a customer can select. For example,“1” will require that at least 1 modifier be selected and “0” will allow the customer to add an item without selecting any modifiers.
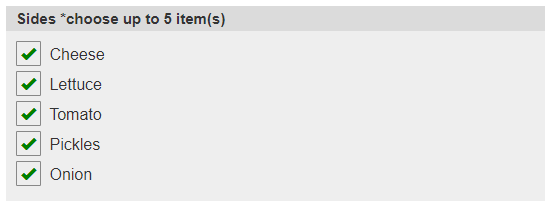
- The Max value will be the most amount of modifiers a customer can select. For example,“5” means they can choose up to 5 modifiers in the grouping.
- This is useful for items with multiple sides, such as toppings on a burger where customers can select no modifiers or several.”
5. Once finished click the Save button.
![]()

